SciGen Teacher Dashboard
Unit L7
Seeing Inside Cells
 Lab: Using a Microscope
Duration: Approximately 50 minutes is enough time to prepare, observe, and sketch onion cells
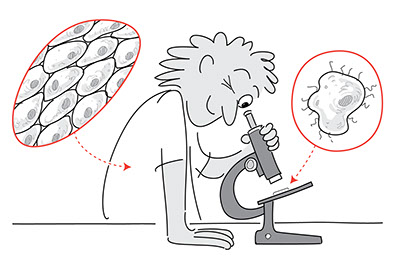
Use your powers of observation and high and low power objectives to see a variety of cells. Use your drawing skills to record what you see in the microscopic world.
LEARNING OBJECTIVES
Students conduct an investigation to provide evidence that living things are made of cells; either one cell or many different numbers and types of cells.
Students develop and use a model to describe the function of a cell as a whole and ways parts of cells contribute to the function.
Students follow precisely a multi-step procedure when carrying out experiments, taking measurements, or performing technical tasks. (Grades 6-8)
Teacher Tips
- Students would benefit from first learning how to draw a biological diagram. See Activity L7.5 Lesson: Drawing to See.
- This lesson requires a great deal of organization and preparation on the part of the teacher for success.
- Your classroom may have various kinds of microscopes to use. There are traditional optical microscopes, digital microscopes, and attachments that can turn the camera in a phone or tablet into a microscope. You may consider providing students with a Foldscope. A Foldscope is a low-cost, easy-to-assemble microscope made mostly out of paper parts, designed at Stanford University for use around the world to look at the natural world and to help keep local communities healthy. Some designs of the Foldscope can also be used with a phone or tablet camera to take pictures or video.
- If you don't want the students to quarter the onions, you can prepare them the morning of the lab and refrigerate them in air-tight containers.
Safety Checks
- Review with your students all your school's safety protocols when doing labs.
- Stains can cause permanent damage to clothes and laboratory surfaces. Handle carefully. To reduce risk of spills when (and if) students stain the specimens, transfer the solutions into a set of dropper bottles. Keep these tightly sealed and the stain will be usable for years.
- Always carry microscopes carefully by the base and the arm.
- Instruct students how to rotate the objectives and adjust the position of the stage so that the objectives don’t get scratched or broken.
- After using a microscope, students should always leave it with the shortest objective perpendicular to the stage so that if any students “play” with the adjustments, they won’t damage the objectives.
- The procedures below include cutting and using the razor blades or scalpels, and optional extensions include a Bunsen burner or alcohol lamp.
- Note: some districts have restrictions about using any cells from students in science class. If this is the case, use prepared slides of cheek or other animal cells for this activity.
Materials
- light microscope
- onion bulb, cut into quarters
- forceps or tweezers
- dissecting needles
- stain (iodine or methylene blue)
- finger bowls or other containers 4 in. / 10 cm wide
- slide and cover glass
- medicine dropper
- paper towels
- toothpick
- gloves (to have on hand, optional for students allergic or averse to onions)
-
for optional elodea extension: elodea, a common flowering plant that lives in fresh water, sometimes called
Anacharis
- Elodea plants can be purchased at pet stores.
- for optional mitosis extension:
- new, sharp razor blade, scalpel, or small cutting knife (like an X-acto)
- root from fresh onion bulb (or cuttings of Tradescantia or Zebrina)
- prepared slide of onion root tip
- prepared slide of Ascaris or whitefish eggs
- 0.5 % toluidine blue O stain
- 1 N hydrochloric acid
- bunsen burner or alcohol lamp
Teacher Tune-ups
Teaching Notes
The slide preparation and viewing steps outlined below are used with permission. They were originally published as a lab procedure in the textbook Biological Science: An Inquiry into Life, Fourth Edition (1980) by BSCS, a non-profit organization committed to transforming science teaching and learning through research-driven innovation.ACTIVITY OVERVIEW
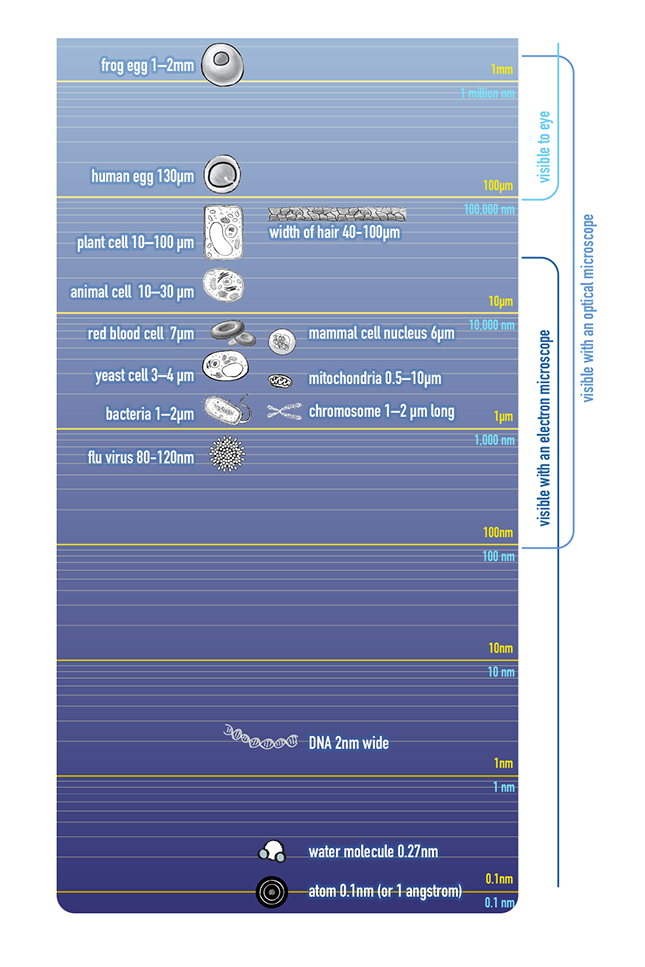
- Discuss the size of cells (10 minutes)
- Introduce safe use of a microscope (10 minutes)
- Prepare slides (20 minutes)
- Observe onion cells (10 minutes)
- Optional: Observe elodea leaf cells (15 minutes)
- Optional: Observe cheek cells (15 minutes)
- Optional: Observe mitosis (20 minutes)
- Review cell diagrams (10 minutes)
Discuss the size of cells (10 minutes)

How big are cells?
What might be smaller than a cell?*
How many of each of the following do you think would fit on top of a penny? *
- red blood cells?
- bacteria?
- Paramecium?
- skin cells?
Note: The starred questions developed by SCALE / SFUSD
Introduce safe use of a microscope (10 minutes)
Microscopes are expensive equipment that can be easily damaged. Spend some time making sure your students know how to use them properly.
Do students know how each of the parts of the microscope work? Teach your students the names and functions of their microscope's parts and how they all work together. Once they “graduate” on how to properly use a microscope and identify the parts of a microscope, they could easily complete this lab activity.
Some teachers have students earn a “Microscope License." Licensed students would:
- name and describe the functions of a microscope's parts
- create wet mount slides
- magnify common objects using the low-power and high-power objectives
- demonstrate use of the fine and course adjustments
- demonstrate use of the stage clips
- adjust light with the diaphragm
- show how to safely carry the microscope
- know how to calculate total magnification depending on which objective they magnify with
Once students accomplish all of the above, they earn a “Microscope License” to use the microscope anytime it's needed in the classroom. Students often feel a strong sense of accomplishment with this approach.
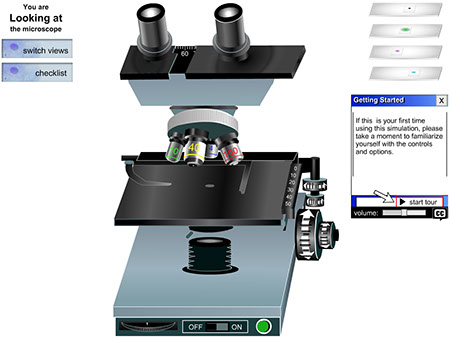
Another approach: have your students demonstrate their mastery with a simulation, such as the University of Delaware Virtual Compound Microscope. It allows students to practice setting up a microscope, locating a specimen, and carefully focusing an image without any risk of breaking slides or equipment. The online tutorial also offers immediate feedback for students who are struggling, such as a visual reminder of what steps to follow and a set of sample microscope problems that allow students to test their skills. Once students have practiced with the virtual microscope, they can transfer these skills directly into the lab. Important note: Some devices may not be able to use the University of Delaware Virtual Compound Microscope simulation because it requires Adobe Flash.
- Turn on the light source.
Put the slide on the specimen stage, held by the slide clip.
- Select the objective (the part containing the lens) with the lowest magnification.
- Center the specimen over the circle of light.
- Use the coarse focus knob first before using the fine focus knob.
- Position the part of the specimen you want to see more clearly in the center of view.
- When you change to a higher magnification objective lens, focus with the fine focus knob.
Prepare slides (20 minutes)
Note: Preparing slides is a valuable skill, but some students may have an allergy or aversion to the smell of onions. You may instead use prepared slides or prepare the slides for the students.
Each onion quarter will separate neatly into layers.
Hold one of the layers with both hands, so that it curves toward you.
Push your thumbs away from you and pull the two edges of the onion layer together.
Starting at one of the torn edges, pull the transparent, paper-thin layer of epidermis, or outer skin, from the surface. It comes off in a sheet.


Make a wet mount of the epidermis as follows:
- Use the razor blade to cut a piece of epidermis about 1 cm square.
- Place this piece in a drop of water on a clean slide. Smooth out wrinkles in the epidermis with a dissecting needle.
- Put on the cover glass. Be sure the water comes to its edges, but not beyond. Add water at the edge with a medicine dropper, or remove excess water with paper towel, as necessary.


Observe onion cells (10 minutes)
Students can use this template to record their observations of the cells in the lesson.
Students should describe what they see in the microscope with words and by making a labeled diagram.
At the end of the observations, you will be reviewing the diagrams students drew. You may want to state some of the expectations you have for their diagrams before they get started. As you evaluate their diagrams, you may choose to note diagrams that
- are drawn neatly with clear lines
- use color to enhance understanding, not decoratively (if colored pencils are used)
- note some parts of the cell
- appropriately omit extraneous details
- are accurately drawn and labeled
- are labeled neatly without overlaps
- include titles and magnification
Look at the cells of the onion epidermis under low power.
What is their general shape?
If you did not know their origin, how could you tell they are plant cells?
Observe the cells under high power. What evidence is there that these are living cells?
Find a cell nucleus
Remove the slide from the microscope stage.
Place a drop of the stain (coloring) at one edge of the cover glass.
Draw it under the cover glass by touching a piece of paper towel to the opposite edge.
(CAUTION: Stains can cause permanent damage to clothes and laboratory surfaces. Handle carefully.)
Under low power look for a nucleus that is stained brown or blue.
What is its shape?
Switch to high power and look at the nucleus again.
Where is the nucleus located in the cell?
How can you tell that the cell has depth?
Look at the area between the nucleus and the edges of the cell. You will find a fine granular (grainlike) substance that has been stained lightly.
Does the substance fill the entire cell? Describe what it looks like. How might this substance be different in cells that have not been stained?
Optional: Observe elodea leaf cells
Elodea (sometimes called Anacharis) is a common flowering plant that lives in fresh water. The green cells of elodea are similar in general structure and function to those in most other plants. Elodea plants can be purchased at pet stores.
Students should describe what they see in the microscope with words and by making a labeled diagram.
Take one plant from the bowl. Break off one of the younger leaves near the tip.
Place the leaf with its underside up, in a drop of water on a clean slide. Put on a cover glass.
Look at this leaf under low power. Some cells seem to be packed with small green bodies. These bodies are called chloroplasts.
Do you think that these elodea cells have the same function as those of the onion you looked at? Why or why not?
The part of the onion from which you took cells is usually found below the ground. The elodea plant is found where sunlight strikes the plant.
What does this suggest about the function of chloroplasts?
Where are the chloroplasts located in the cell?
What is the shape of a chloroplast?
Describe the movement of chloroplasts.
Chloroplasts have no means of moving about. How might their movement be explained?
Other structures are present in cells of elodea. But all of these except the cell wall, are hidden by chloroplasts. With patience and careful observation of many cells, however, you may be able to find a nucleus and other parts of the cell.
What methods might you use to see these structures better?
Compare and contrast the two kinds of living cells you have seen. How are they alike? How do they differ?
Optional: Observe cheek cells (15 minutes)
Look at animal cells—your own!
Place a very small drop of tap water on a clean side. Rinse your mouth out with water. With the broad end of a toothpick, gently scrape the inside of your cheek. Deposit a little of the scraping into the drop of water by rolling the toothpick in it.
Stir the scraping into the drop of water with a toothpick until all of the drop is cloudy. Add a small drop of stain to the scraping. Place a cover glass on the slide. Observe with low power. You may find that some of the cells are folded over or piled on top of one another. Some may be broken. Find one or two that you can see clearly. Center these for viewing.
How does the edge of this kind of cell compare with the plant cells you observed?
Turn to the high-power objective. The nucleus of each cell should be clearly visible. You may have to adjust (usually reduce) the light.
Using the fine adjustment, focus up and down on one cell to determine its shape.
How does the shape of this animal cell compare with the shape of the plant cells you observed?
How would you be able to tell that this cell was from an animal and not a plant?
How are the plant and animal cells you have seen alike?
Would you expect cells from other parts of your body to be exactly like the cells from inside your cheek? Why or why not?
An organism may have many small cells rather than a few large cells. Suggest one or more possible explanations for this.
Optional: Observe mitosis (20 minutes)
There is great deal of movement and constant change going on during mitosis.
Students should describe what they see in the microscope with words and by making a labeled diagram.
Given the safety considerations needed for a roomful of students handling sharp blades, you may consider the student preparation of slides an optional activity. Using prepared slides might be best.
Select a root of an onion that is 2 to 3 cm long. Place it on a clean slide: Cut off 1 to 2 cm of the root tip. Discard any remaining upper portion.
Place three drops of 1 N hydrochloric acid on the root tip.
Wait about 1 minute. While you are waiting, heat the slide by passing it back and forth over a flame (CAUTION: Hold the slide with forceps so you won’t burn your fingers. Do not allow the liquid on the slide to boil.) Heat the slide in this way two or three times. Carefully blot off the acid with a strip of paper towel.
Cover the root tip with two or three drops of toluidine blue O stain. Warm the slide for about one minute as you did before. Carefully blot off the excess stain.
Add a drop of fresh stain. Apply a cover glass. Place the slide in a folded paper towel on a hard surface. Press the cover glass with your thumb, using a steady, firm pressure. Be careful not to break the cover glass.
Clean the stain from the slide and cover glass. Examine under low power of your microscope. When you have located the cells, switch to high power. The cells may be stained so darkly that you cannot see the individual parts. If this happens, dilute the stain by placing 1 or 2 drops of water at one edge of the cover glass. Place a piece of paper towel at the opposite edge to pull the water through. Repeat this until you can see the stained portions of the cell.
Find these stages of mitosis:
- The nuclear material forms long, slender threads that are stained. At this stage, the separate chromosomes cannot be identified. They form a loose ball of tangled and twisted threads.
- The individual chromosomes are much shorter and thicker. At this stage, each chromosome has two strands, or chromatids. The strands are held together at the centromere.
- The chromatids have separated and are now two separate groups of chromosomes.
- The two nuclei are present in the cell with strands of chromosomes still visible.
Make simple sketches of what you find. Describe the structures you see.
What problems did you have in making this study?
Study a prepared slide of dividing cells in the onion root tip. (The stain used for the slide is different from the one you used.)
Scan the entire length of the section of root tip, using low power. Where do you observe cells dividing? Where are the cells not dividing?
Locate some cells in division. Switch to high power and look for the following stages:
- Early appearance of chromosomes in the nucleus. Find round structures that stain at this early stage. These are the nucleoli.
- The chromosomes are easy to see and grouped in the middle of the cell.
- Chromosomes have separated and moved toward the poles.
- A new cell wall is formed between the new cells.
What has happened to the nucleoli?
What is the condition of the nuclear membrane?
Find the spindle. The end of the spindle fibers that are near the center of the cell are attached to the centromeres of the chromosomes. How many chromosomes can you see? What part do you think the spindle fibers play in moving the chromosomes?
Look for the beginning of the new cell wall. Where does it appear?
Cells divide rapidly in embryos (young organisms, at very early stages of development). These cells are good material in which to study mitosis. Carefully examine a prepared slide of either Ascaris (a worm) or whitefish embryos. Look for the following stages:
- The chromosomes are long and threadlike.
- The double chromosomes are attached to spindle fibers at the center of the cell. Look at the poles of the spindle and compare them with those of the plant cells you studied.
- The chromosomes are separating and the cell is pinching in two.
How many individual chromosomes are in one cell? How do the poles of the spindle of an animal cell differ from those of a plant cell?
Compare the separating of chromosomes and dividing of these cells with what you saw in plant cells.
What structures do you see in the dividing animal cell that were present in the dividing plant cell?
Review cell diagrams (10 minutes)
In this activity, students have illustrated similar cells from different samples. Ask students to share their diagrams.
Ask:
What are some things that you see in common between the different images the class drew?
- Diagram is drawn neatly with clear lines.
- Parts of the cell are noted.
- Diagram appropriately omits extraneous details.
- Diagram is accurately drawn and labeled.
- Diagram is labeled neatly without overlaps.
- Diagram includes titles and magnification.
- Color enhances understanding and is not used decoratively (if colored pencils are used).
BETA Version - Please send comments and corrections to info@serpinstitute.org
