SciGen Teacher Dashboard
Unit E2
Work and Machines
 Lesson: A Closer Look at Levers
Duration: Approximately 60 minutes
We're surrounded by levers! They don't always look like a seesaw or a catapult, however. In this lesson, students review the concepts of effort, fulcrum, and load so they can see levers wherever they appear.
LEARNING OBJECTIVE
Students classify levers into three classes by looking for the placement of effort, fulcrum, and load in common items.
Teacher Tips
- Many of the objects used as examples in this lesson are easily obtained. And there are many other objects that have levers that you can add to your students' classification task. You can bring in examples for your students to use (pliers, wheelbarrow, nutcracker, hockey stick, tongs, bottle opener, oar, 3-hole punch, hammer, fishing rod).
Teacher Tune-ups
Teaching Notes
ACTIVITY OVERVIEW
- Review effort, fulcrum, load, and lever classes (10 minutes)
- Introduce first class levers (15 minutes)
- Introduce second class levers (10 minutes)
- Introduce third class levers (10 minutes)
- Turn and Talk (15 minutes)
Review effort, fulcrum, load, and lever classes (10 minutes)
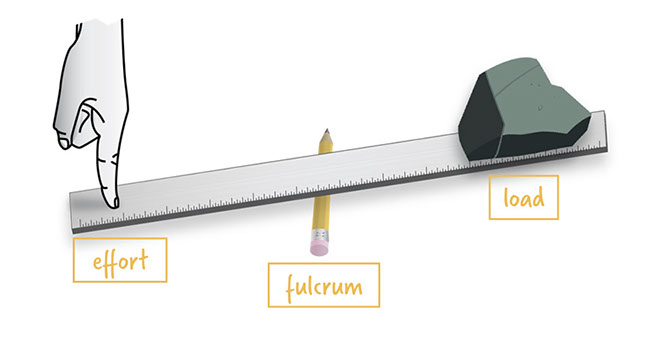
Review the terms effort, fulcrum, and load with students.
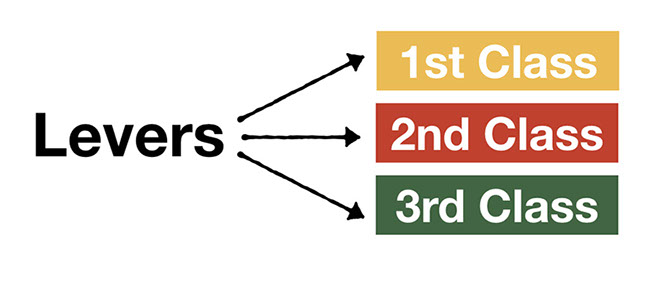
Introduce to lever "classes." You may wish to ask students what it means to "classify" things.
Ask:
What types of things do scientists classify?
Possible answer:
Animals are classified into reptiles, mammals, amphibians, birds, and marsupials for example.
Mention that there are three different classes of levers.
Introduce first class levers (15 minutes)
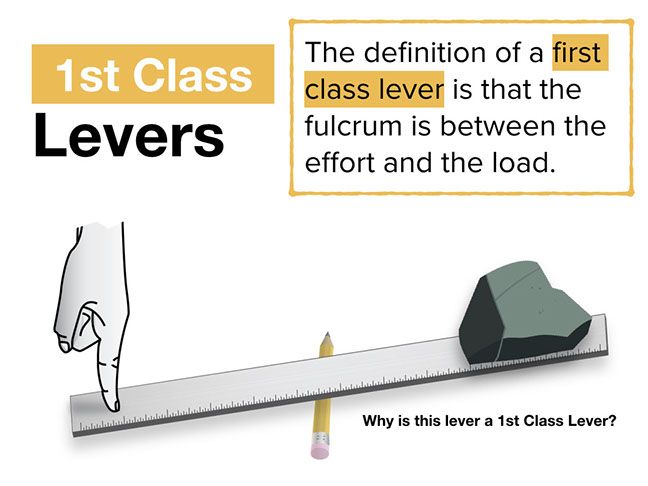
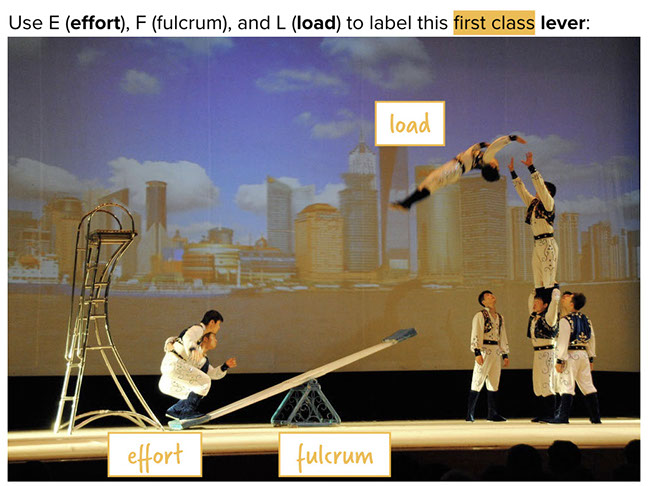
Most students will correctly label the lever in the photo. The two performers jumping on the board are the effort, the metal triangular structure is the fulcrum, and the performer flying through the air is the load.
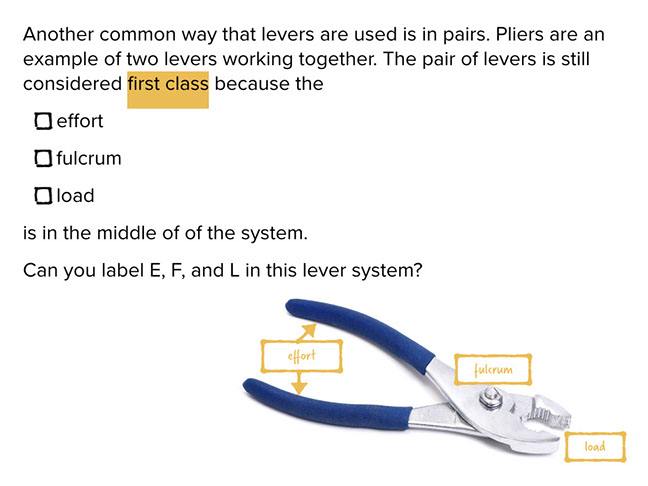
Most students will correctly check that the fulcrum is in the middle of the system.
The handles of the pliers are the two efforts (they are what is being pushed), the fulcrum is the center pivot point, and the jaws are the loads. Spend a moment to emphasize that the pliers have two levers, one for each handle and attached jaw.
Introduce second class levers (10 minutes)
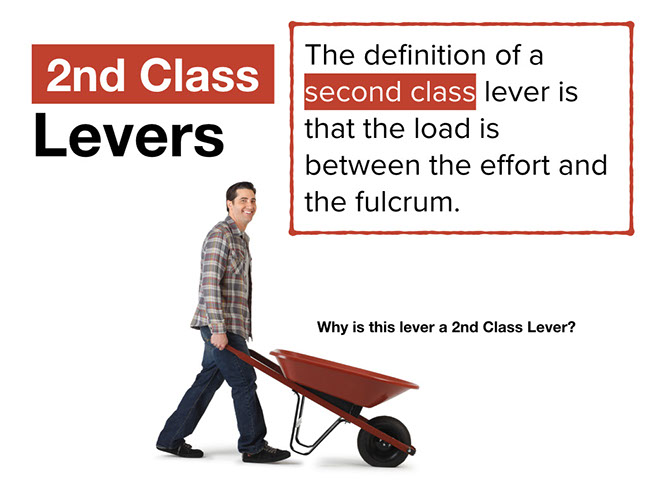
A wheelbarrow represents a second class levers. The effort is applied at the end of the handle by the gardener. The fulcrum is at the wheel – at the opposite end of the handle. The load is carried in the wheelbarrow bucket.
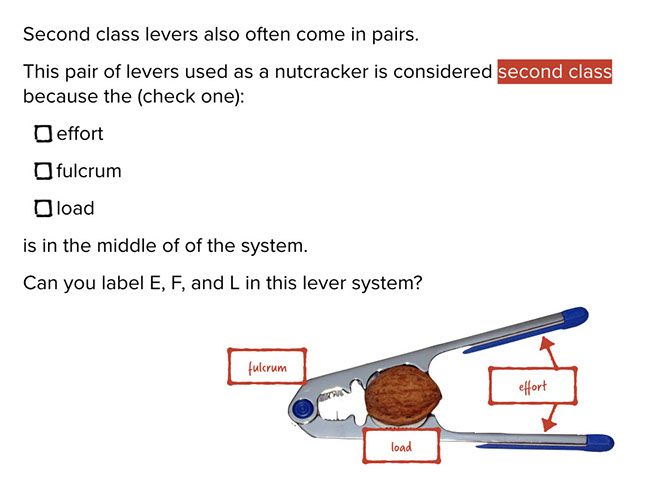
Most students will correctly respond that the “load” is in the middle of second class levers. They should correctly label the nutcracker. The end of the handle is the effort. Where the two handles are attached is the fulcrum and the load is applied in the middle of the handles. You may want to ask students where they don’t want to have their fingers – that would be the load! Similar to the pliers, emphasize that the nutcracker has two levers.
Introduce third class levers (10 minutes)

A hockey stick is a great example of a third class lever. You may want to ask students where they should place their hands when swinging at a hockey puck. Have one student demonstrate how they would swing a stick – use a meter stick or a broom. Point out that to get the most power (or work) from swinging the stick, the top hand should be stationary and the bottom hand pushes. A hockey player often pushes the puck along by moving both hands, but for long shots the top hand is stationary and acts as the fulcrum.
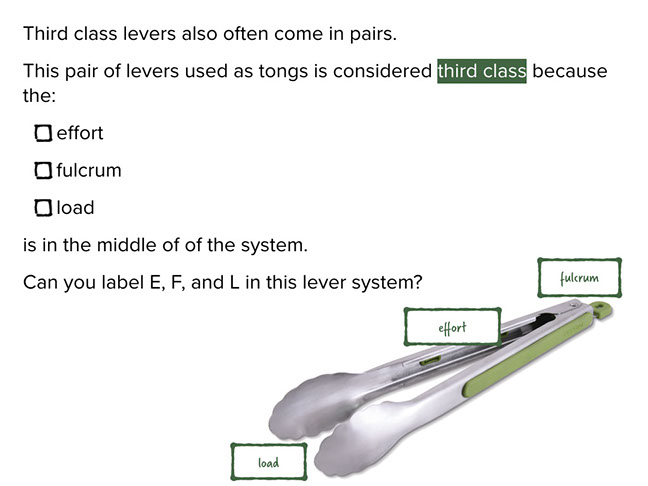
The answer to the question for the third class levers is: “the effort is in the middle of the system.” The fulcrum for the tongs is where the two ends are attached, the effort is in the middle and the load is the serrated ends.
Turn and Talk (15 minutes)
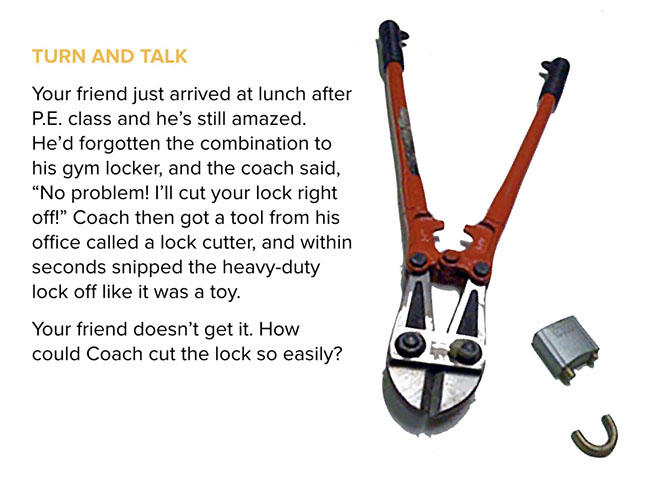
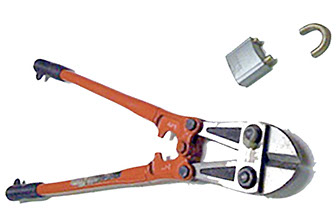
For the Turn and Talk, instruct students to discuss how an extremely strong lock could easily be cut by a lock cutter. Challenge students to use as many of the focus words as possible when explaining how the bolt cutter works. A complete answer may include statements such as the following.
- The cutters are two levers. In the middle of the cutters is a strong metal pin. That is the pivot point, or the fulcrum. Each handle is called an effort, or the place where the coach applies force. Each jaw is called a load and they exert the force to cut the bolt. The cutters are two class one levers because for each lever, the fulcrum is between the effort and the load – just like a pair of scissors.
BETA Version - Please send comments and corrections to info@serpinstitute.org